Minnesota Clay Co. USA Technical Info - Using Potter's Slip |
| Minnesota Clay USA introduced Potter's Slip in 1996.
It is most frequently used to slip trail a nice raised decoration
directly on to greenware. Lesser known, but equally pleasant, is its
ability to be brushed on to greenware for other effects. This
article covers two techniques: Sgraffito and Paper Resist. Sgraffito
is a technique that involves applying a layer of slip to leatherhard
or softer greenware. The slip layer is allowed to set up, then the
potter uses a tool sometimes cryptically known as a sgraffito
tool, to cut through that fresh layer of slip, revealing the
underlying contrasting color of the clay. It's really easier than
that, here are some pictures. |
|
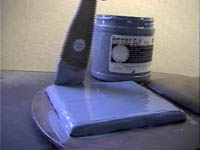 |
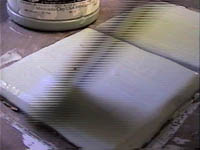
Applying a nice thick coat of slip to a
hand-pressed greenware tile. |
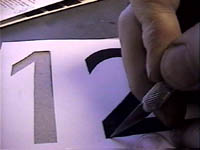
| Creating a paper stencil from numbers generated on the computer
and printed on plain paper. Of course most sgraffito is done as a
freehand decoration, but these tiles are going on the house to help
guide the fire department, police and most importantly the Pizza
Central guy - so I want them to be legible from the street. |
 |
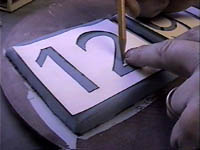 |
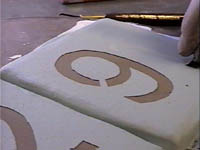
Tracing the stencil on to the dried layer of slip. |
| Carving through the slip using Kemper 6" Wire Loop Sgraffito
(catalog number
KTWLS) |
 |
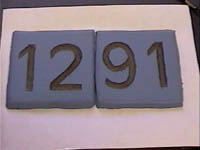 |
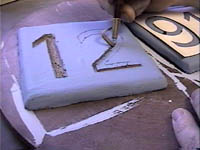
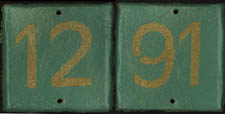
The new house numbers, ready for the kiln! Once bisque-fired,
the tiles will be clear glazed and fired to cone 8. |
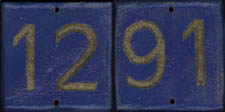
| The completed project, fired to cone 8. Blue Potter's Slip. |
 |
|
|
| Paper Resist is a technique which involves applying
paper cut-outs to your clay, coating your piece with slip, then once
dry, removing the paper cut-outs to reveal your artwork. Using our
house number tile concept, the steps are as follows: |
|
|
  |
|
| Using a brayer or a straight-edge, press your paper
cut-outs firmly into the clay. |
|
 |
Brush a thick coating of Potter's Slip over the tile.
|
| Once dry, peel back the paper revealing the paper resisted
areas. These tiles will now be bisqued and then glaze fired at cone
8. |
 |
 |
The finished tiles - glazed and fired to cone 8. Turquoise Potter's
Slip. |
| |